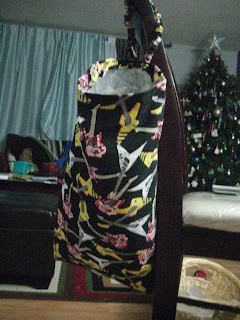
Now, Mad is the coolest person he knows. He drives a cool vehicle, plays cool guitars and drums and starts cool new facial hair trends at his work. Plus, if there is something that he wants, that he doesn't already have, he will just go buy it. So what do you get the coolest person who has everything? Well I'm glad you asked. You make him something. The thing about the cool car is that he is ultra sensitive to any mess in it (yes we do have 3 kids), so I decided to make him a cool garbage bag for his car. He can hang it in the front seat when it's just him, or flip it round back so that the kids can use it in the back seat, cause it hangs from the headrest. I saw this idea somewhere on another blog and would totally give props, but I can't remember where it was or on what blog, so if it's yours and you are reading this, thank you.
Here goes:
Step 1:
Find super cool material. I happened to find guitar flannel. Not just guitars though, it has the Eddie Van Halen signature guitar print on it. Mad will love it.
Step 2:
Cut your material, for the bag I used The flannel, cut 40" x 14", I cut a plastic table cloth the same and made a casing for the elastic 40"x 1". Oh and the elastic is I made 14"long (1/4").
Step 3:
I made the casing for the elastic, fold the long strip in half, lengthwise, right sides together and sew with a zigzag stitch.
Turn the casing right side out, I used a bbq skewer.
Thread the elastic through and sew at each end. You will have a nice gathered elastic cover.
Step 4:
Sew the plastic together, up the sides. (I had troubles with this, cause the plastic kept sticking to the machine, so I just lifted the presser foot and made a pretty sloppy stitch, but it's covered)
Step 5:
Fold the larger piece of material in half, sideways, right sides together, and sew up the sides. Turn it right side out and you should have "a bag".
I know its a repeat pic, but my camera was dying so I worked with what I could
Step 6:
Place plastic bag inside flannel bag and pin corners together. At the top, fold over about 1/2" and sew a top stitch around the top of the bag. DO NOT FINISH IT ALL THE WAY!!!!! About 1/2 way on one side, slide one end of the elastic casing under the presser foot as you are sewing and double back over it. About 1" over, do the same with the other end of the casing. Finish the seam.
Step 7:
Sew a top stitch along the sides and bottom of the bag. This will prevent the plastic bag from slipping inside and give you a neat finish.
Wrap it up and I hope he likes it.
Enjoy your day, enjoy your family and happy crafting!


No comments:
Post a Comment