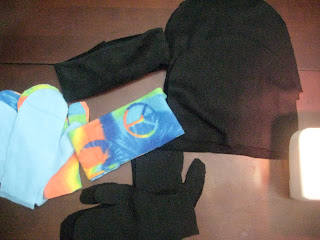
It was really easy to do..... Recognize the material? I used the scraps of fleece that I had in my stash and was able to come up with a few things. I will probably go get some more and make some more, as the kids like that I was able to do this and would rather that I sew than buy it.
But first, a pic of half of my on the go projects, all due in 2 weeks.
And now on to the actual tutorial:
Mitts
Step 1:
Cut a mitt pattern around your hand, (I am not a giant fan of actual patterns, as I have said in the past) and cut 3 more in the same material, then cut 4 in a coordinating material. This will give you a lined pair of mitts. Make sure to leave a 1/2 inch seam allowance.
Step 2:
Sew around mitt liner, leaving the bottom open. Measure and cut a 1/4 inch elastic to fit around your wrist snugly. Attach it to the bottom of the mitt liner about 1 inch up, with a loose stitch to allow for pulling. Place the right sides of the outer material together, and sew around the edge, 1/2 inch seam allowance. Turn right side out and repeat with the other set of mitts.
Step 3:
Tuck liner into outer shell and tuck edges under, sew with a 1/4 inch seam allowance, taking care not to sew the mitt together. (I did this already)
Ear warmer
Step 1:
Cut material about 8 inches wide and measured to fit around your head in length, adding about 1 inch for finishing.
Step 2:
Fold in half lengthwise with right sides together. Sew a seam along the length of the ear warmer. Turn right side out.
Step 3:
Fold in open edge about 1/4 inch, and slip other open edge in and pin.
Step 4:
Sew a 1/4 inch seam across, taking care again not to sew it together from the backside.
Step 5:
Get daughter to model and make her model face!
Toque
Step 1:
Cut a half circle, measured about 11 inches from side to side and about 7 inches up to the meet in the middle. Cut 2.
(pardon the sideways picture)
Step 2:
Run a 1/4 inch seam around the toque and cut away any excess material.
Step 3:
At the bottom, fold up at least 2 inches (for added ear warmth) and sew a zigzag stitch to keep it up.
Step 4:
Get son to make a ridiculous face as he is modeling the toque.
Yes my children love the camera.
See you here tomorrow as you all are excited to hear a classic phrase from gouliana.
Enjoy your day, enjoy your family and happy crafting.


No comments:
Post a Comment